Cake Balls
1 box of cake mix
Ingredients needed on cake mix: water, eggs, oil
1 can of prepared frosting
Almond Bark
Optional Items:
lollipop sticks
oil based candy dye
Decorative items like: chopped nuts, sprinkles, etc
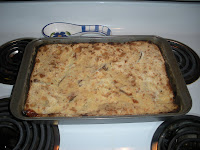
First, make and bake the cake as directed on the box.
Once baked, I removed it from the pan immediately to start cooling. [Side note: And, wouldn't you know that the cake came out perfect, but if I had really needed the cake to come out perfectly for some time when I wasn't going to mutilate it, then you know it wouldn't have! okay, I'm done...back to cake balls...]

While the cake is still warm, crumble it up into a large bowl. You can use your fingers or an electric hand mixer. (The hand mixer is easier because you want the cake to be a fine texture, but be forewarned that the cake tends to jump out of the bowl!)


Then add 3/4 to 1 full can of frosting apparently depending on taste. What?! According to taste?! Just do the whole can and be done with it. Stirring well until thoroughly combined. Chill the mixture for a couple of hours or speed up this process by placing it in the freezer.

Using your hands or a small cookie scoop (think melon baller size), roll the mixture into balls and place them on a baking sheet covered with wax paper. Recommended ball size is 1 1/2 inches--smaller balls rather than large ones are easier to eat later. This makes about 30-35 cake balls.

Gotta get your kiddos into it!

Finished rolling...whew!

Side note: I had to rearrange all the cake balls into straighter lines BEFORE I could take a picture. LOL!
My Personal Notes about Rolling the Balls:
Use a cookie scoop. Mash it in there. Peel off the excess around the edges. Release the cake ball from the scoop into your hand. Admire the almost perfectly round cake ball. Place it on wax paper and be done.


Optional Step for Cake Pops:
After rolling all the balls, insert sticks into each ball. Then, resume with the following directions.
Back to Everyone:
Chill for several hours in the fridge. Or if you are in a hurry, then place in the freezer. I do not have room in my freezer AT ALL, so I used the fridge. *Note: I had them in the fridge for 6 hours before I felt like they were firm enough!
About 15 minutes before the balls are ready, melt almond bark in a container that is tall and narrow. I don't really have a container like that so I used a measuring cup.

When the almond bark is ready you can stir in 1 tablespoon of shortening until melted. The shortening makes the almond bark more smooth and easier to dip. If you used the freezer, then make sure the cake balls aren't frozen solid when you begin working with them.
Working in small batches, remove some cake balls from the fridge/freezer and dip in the melted almond bark. Use tongs, forks, toothpicks or candy forks to manage the balls and get them completely covered. Place each ball on waxed paper to harden. I had to twist, twirl, tap and beg them to get the excess chocolate off and make them *somewhat* smooth. I don't know how professionals do it, but I'd love to sneak in and watch them!

And, now you are finished! OR...you can decorate the outside of the cake balls with almond bark that has been dyed with oil based candy dye or roll the cake balls (before hardening) in coconut, chopped nuts, sprinkles, chopped candy bars etc. The ideas are endless...
Most recipes and blogs say to keep them at room temperature once completed and I tried that. But, I'm telling you, they are WAY better cold. (I think the concern is that the chocolate coating will crack in the fridge but mine didn't.) Plus, they really don't last that long...truly!
I did attempt to dye the white almond bark to see if that would cover up my chocolate cake better. So, I used red paste dye stuff:

But, I think I need to thin it out more because it was way more gloppy. See?

I also put a couple on some sticks I had and it was actually much easier to smooth the chocolate on the cake balls when they were on the stick. I guess because I didn't have to touch them at all with anything...just twirled and tapped. When I do these again at Christmas, I'll definitely be using the sticks.

And, here's my silly attempt at "decorating" them with sprinkles. LOL. You can laugh...I did. And, that's why there's only ONE of these. :)

Finished plate of them for my little family. They are SO good! My meat-eating husband couldn't stop praising them, but it was slightly hard to understand him with his mouth so full. However, I did hear him say that they are his new favorite dessert and maybe even better than steak. Nah, that can't be right, but he did LOVE them.

There's a fabulous website called Bakerella.com with MANY ideas for these cake balls including making them into cake pops HERE. They also have wonderful pictures of holiday themed cake balls that are so beyond my abilities right now, but I can still drool over them! One of my favorites is this Christmas themed reindeer cake pop HERE. I am just in awe of hers!
Ciao,
J


